Part 3: Model Training
This blog series chronicles the engineering behind designing and installing a thermal camera system into our car. Read the first post here.
Data labeling, model quantization, and more
Why ML?
“Night Vision” has been available on-and-off in a few high end vehicles for over a decade. Given when these were first introduced, they likely rely more heavily on traditional computer vision techniques - connected blob detection, morphology/size gates, and maybe HOG + SVM type classifiers with rules-based alerting vs. modern deep learning pipelines.
From Audi in 2012:

In my college days I wrote scripts to erm… automate things in video games that relied heavily on computer vision, so I had some experience with traditional CV. For this project my wife and I wanted to push the state of the art with neural networks and put our Nvidia 4090 to good use.
Why Train a Custom Model?
Two challenges:
We wanted a very specific set of detection classes reflecting the variety of fauna in California. Deer, wild hog, raccoons, and coyote. These classes don’t exist in any pre-trained models we could find (e.g. COCO’s 80 classes, etc)
Thermal imagery is VERY different from RGB imagery. Color cues are absent, textures / contrast represent different things, etc.


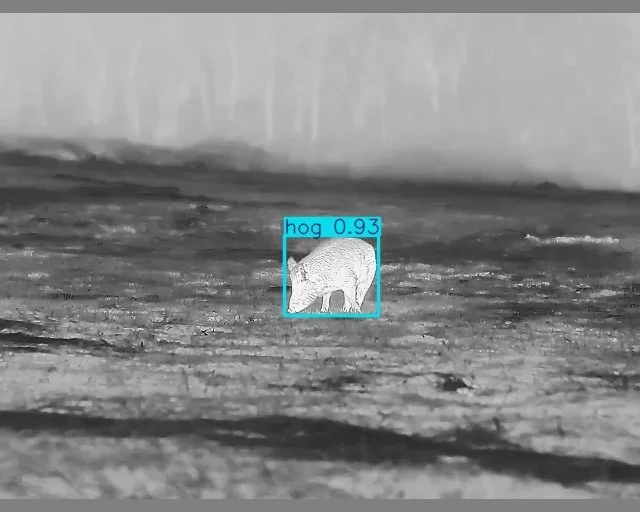
To further illustrate #2, here’s a COCO pre-trained YOLO model vs. the same model trained on thermal images:

Pretrained model (left):
Bird with conf = 0.446
Bear with conf = 0.413
Custom model (right):
Hog with conf = 0.934
Model Selection:
Given the compute power available, and inference time requirements (<13ms to keep up with our camera’s 60hz). We picked YOLO (you only look once) as the base architecture. In practice, one of the reasons YOLO models are fast is because they’re single stage detectors vs. other architectures that take multiple passes (e.g. pass 1 = “where are the things?”, pass 2 = “what are the things in the areas identified in pass 1?”, etc..).
Note: A few months after we’d trained the model we came across DETR models (transformer based), and Meta released DINOv3 into the wild. We’ve been experimenting but have not been able to get to the same recall & precision as the YOLO model while keeping inference time to <13ms.
Model Training - Getting Training Data
Finding thermal images to train on was a genuine pain in the ass. Data wrangling was vastly more work than actually training the model. We started by combining 10 different datasets from a variety of sources (some of these are subsets of the publicly available datasets):
| Dataset | Number of Images | Annotations by Class |
|---|---|---|
| FLIR ADAS | 15,635 | person: 12,323 bike: 113 car: 30,517 motorcycle: 3,314 truck: 2,634 traffic_light: 6,758 fire_hydrant: 277 street_sign: 5,660 dog: 25 other_vehicle: 696 |
| Coyote (roboflow dataset) | 554 | coyote: 399 |
| CVC14 | 6,486 | Person: 13,647 |
| Hog (roboflow dataset) | 700 | hog: 5110 |
| KAIST | 9,853 | person: 24,687 |
| LLVIP | 18,949 | person: 50,793 |
| Raccoon (roboflow) | 511 | raccoon: 415 |
| Deer #1 (roboflow) | 9,421 | deer: 13,998 |
| SMOD | 11,352 | person: 9,887 motorcycle: 14,562 car: 8,660 bicycle: 10,198 |
| Deer #2 (roboflow) | 2,986 | deer: 3,262 |
Model Training - Getting Even More Training Data
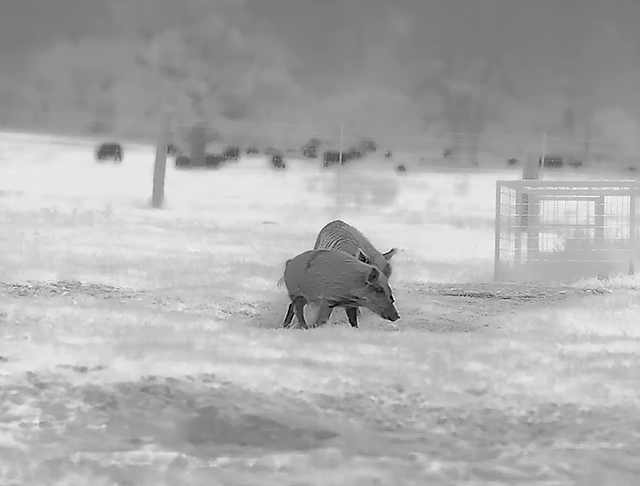
Extreme class imbalances and limited data for coyotes, raccoons, and hogs led to poor model performance in initial model training runs… so we sourced images by sampling 14 different videos we found of hunters filming through their thermal scopes and labelled a few thousand images to compensate. Link to example video purely for academic purposes (NSFL/NSFW).
To make these images usable as training data:
Infill any colored regions (red reticle, etc) with OpenCV’s TELEA inpainting method (red reticle gone):
Run OCR (PyTesseract) and masked and removed any text from the images (same OpenCV inpainting as above) with 2 pixel dilation from detected text). This was to remove time stamps, camera log info, etc.


We further:
Removed any remaining reticles via infilling (pixels on screen that don’t change across N frames + 2 pixel dilation)
Removed any blurry images (computed Variance of Laplacian as a measure of sharpness and dropped bottom 40% of frames)
De-duplicated images by cutting a further 60% of frames via computing a similarity score between frames and dropping similar frames from pairs (keeping the sharper of the pair). We did this via computing pHash distance and a phase correlation coefficient.
Next, we paid LabelBox (and by extension a team of human labelers somewhere) to label these images. We couldn’t figure out a a way to programmatically and reliably determine the images were “black hot” or “white hot” (hottest parts are white), so we just included that as part of the labeling ontology (fun fact: my partners and I actually met LabelBox when they were raising their seed round):


| Dataset | Number of Images | Annotations by Class |
|---|---|---|
| Labelbox | 2,986 | hog: 5,362 small_animal (raccoon+coyote): 3,262 |
The raccoon and coyote were separately labelled, but we chose to combine them into a single class for model training purposes. In practice so long as we could distinguish between various sized animals (deer > hogs > smaller animals) we figured that would be sufficient for downstream collision risk logic. All in all, our combined thermal imaging dataset had 79,035 images with 421,924 annotations.
Model Training - Data Pre-Processing
We pre-processed the 11 datasets by:
Standardizing letterboxing by resizing all images to 640x512 (our camera’s resolution), modifying the annotations accordingly and padding as needed
Harmonizing the training classes to the 5 classes we cared about tracking:
Person
Hog
Bike
Small_animal (coyote+raccoon)
Deer
Stratified sampling by class into train/test/val sets (80/10/10)
Normalizing brightness by sampling images from each data set and normalizing the 5th-95th percentile brightness statistics against the FLIR brightness as a base (basically histogram matching). This is necessary because different thermal cameras have different gain control (i.e. it’s not like there’s a consistent mapping between temperature and pixel value); this ensures more consistent images
And… now we’re finally ready to train. Some finangling with training settings later (particularly training augmentations and introducing focal loss to help with class imbalances, etc…)
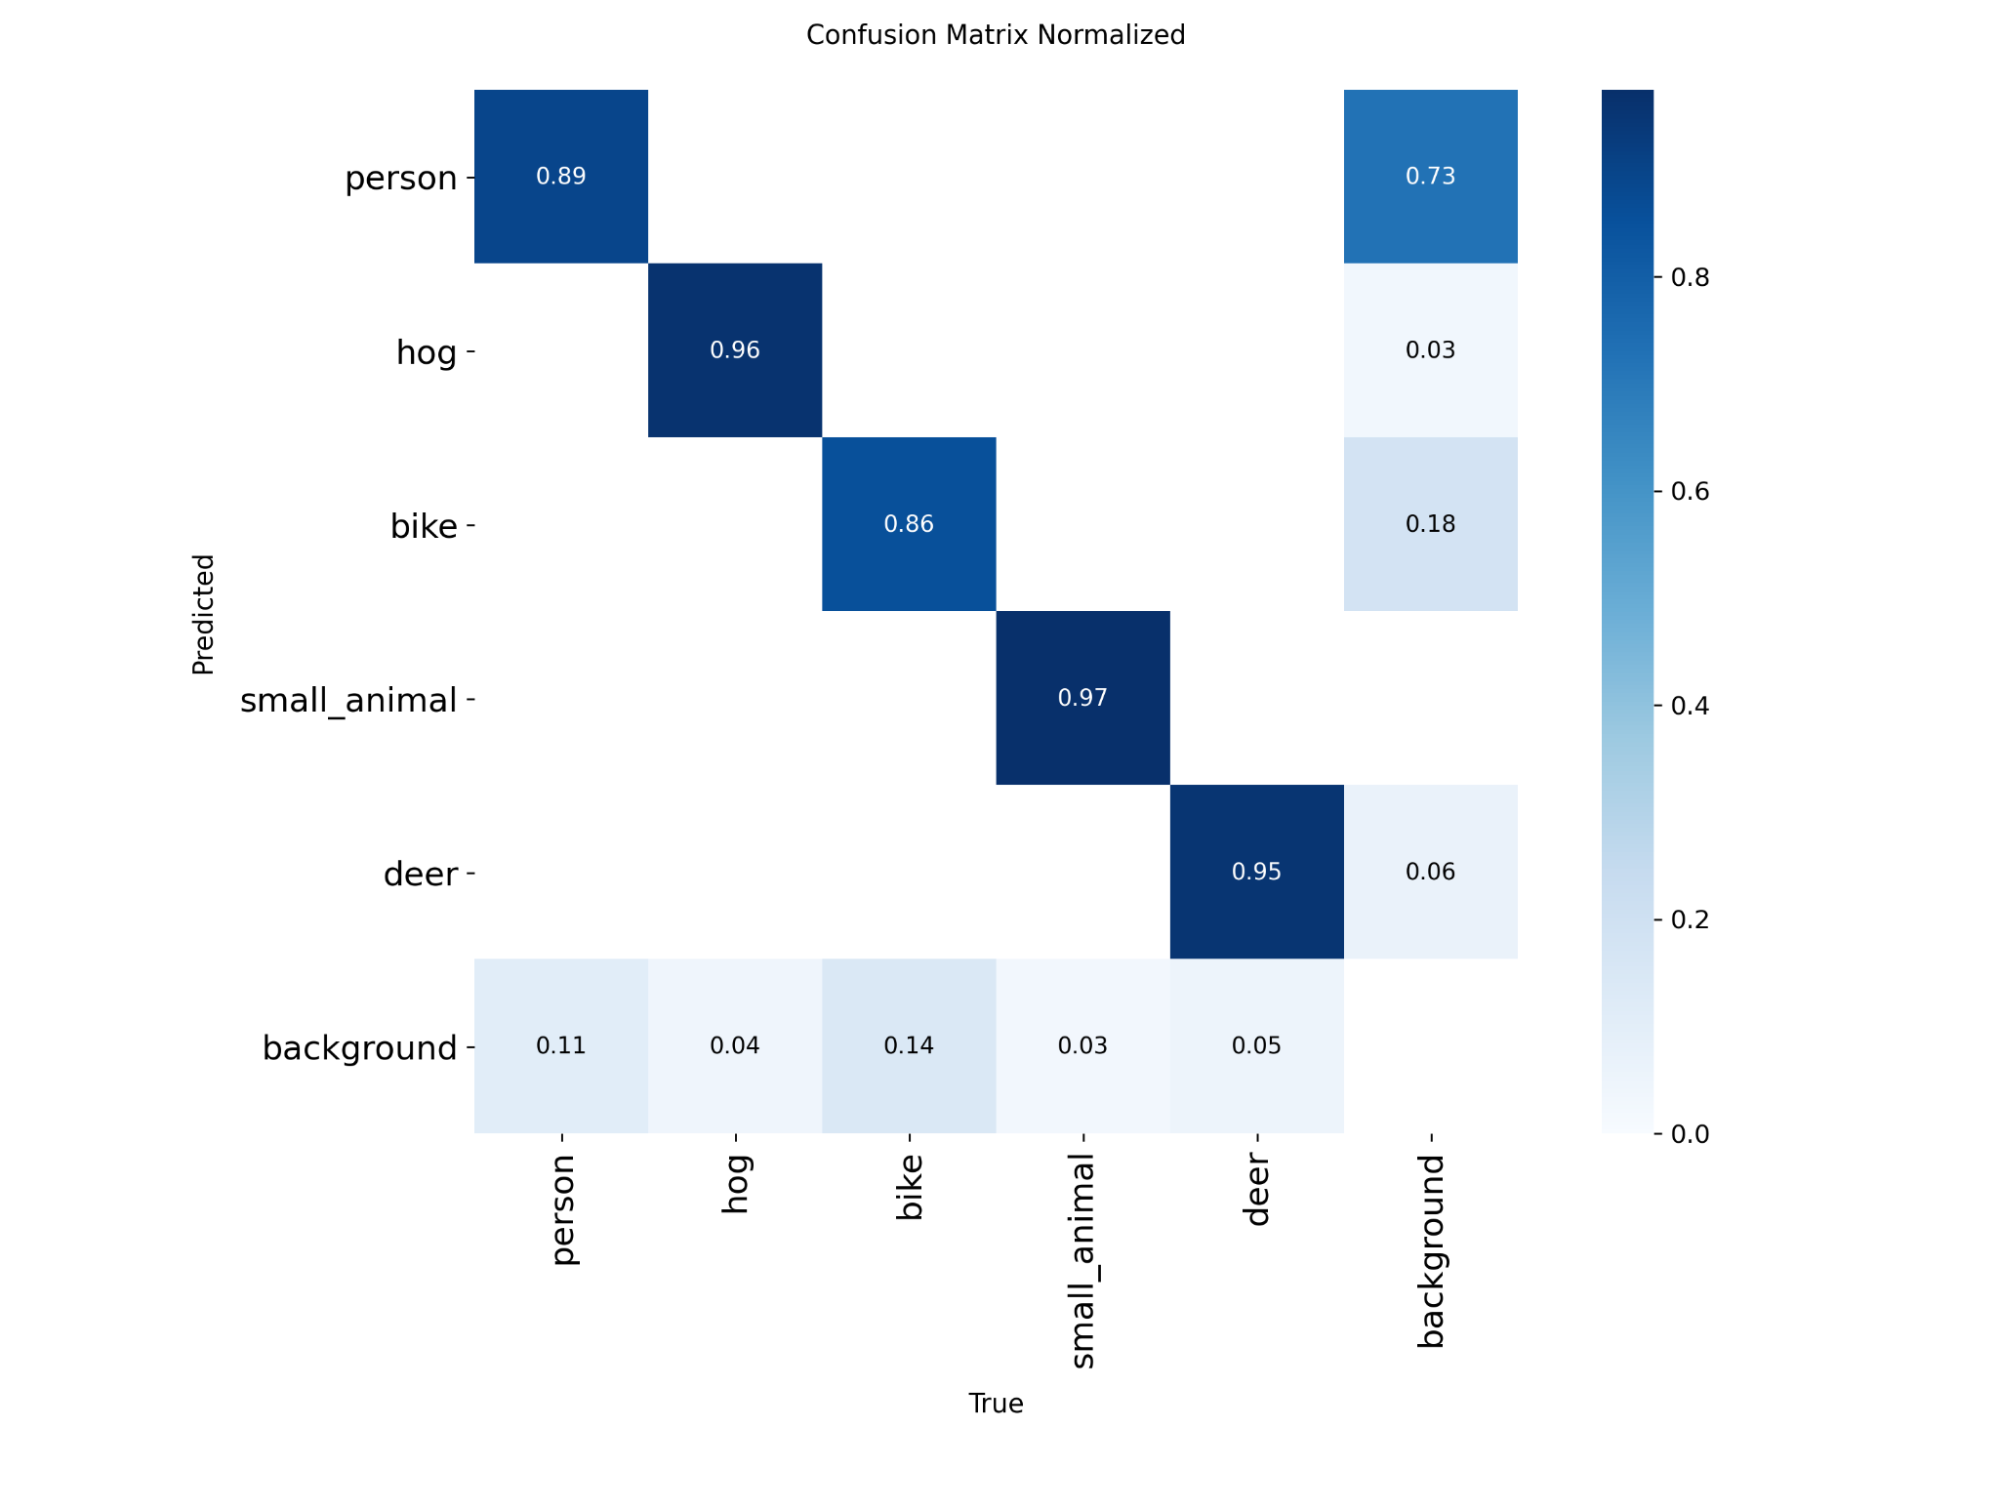
Model Training - Results (Finally!)
Confusion matrix:
Not bad! Precision-recall curve:

(note the step ladder small_animal PR curve - extremely small sample set in test set (Raccoon, coyote, dog = 400 test/val images. May revisit this later… ). mAP50 and mAP50-95:

Model Training - INT8 Quantization:
We moved this over to our Nvidia Orin Nano and quantized into an INT8 .engine model. The FLIR ADK camera supports both 16 bit (0-65536) and 8 bit (0-255), and we wanted to run it in 8 bit mode to minimize inference time. And… we’re done.
Next up - Hardware integration